I gonna try to explain in a few steps , how you can create a new post in Shotsblog. It may seem like it is difficult,but believe me once you get the basics it is quite easy. So lets start.
1 First select new post in the header, there are a few ways to get there, but they open all the same screen

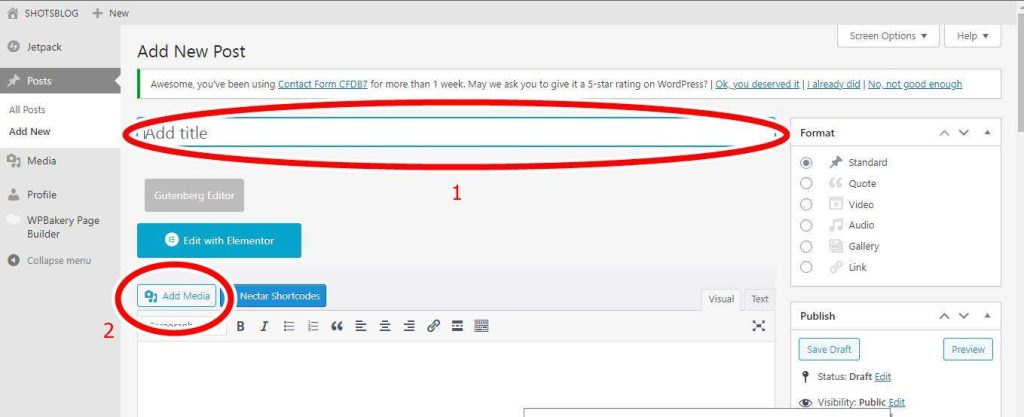
2 So you are in the New Post window now. Here you can put the title of your post ( 1 ). Than you can add media or you can start writing your story. For adding media into your post click add media ( 2)

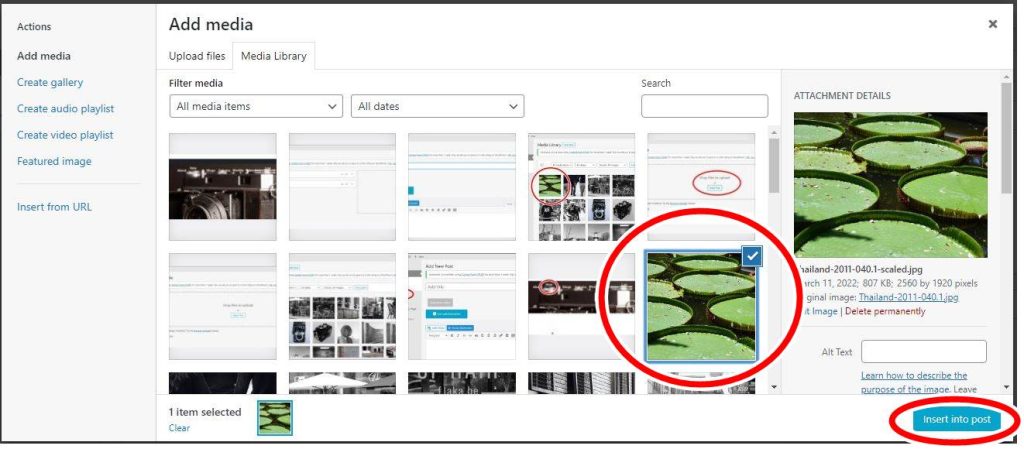
3. The add media window will open, this is actually your media library , all the media you uploaded to your library you can select. You can select more than one at a time. Also if you wish you can upload new files in this screen.

4. So you have selected a photo, the selected photo will be shown on the right hand side of your screen. In this window you can check and select some options for your photo. You can write a caption for example , size and position of the media in the post, can also be done in this small window. Than you can insert the photo in your blog, see step 3

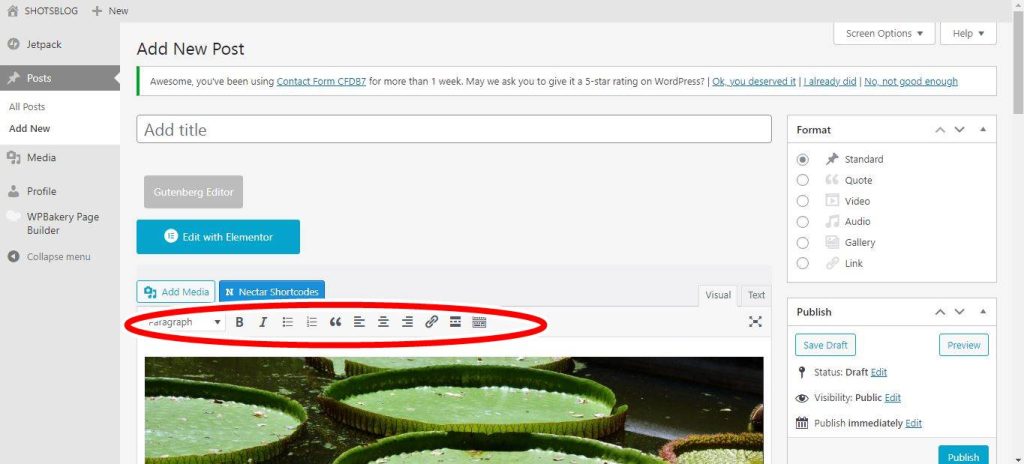
5. So your photo is in the post now. With the editor you can write your story, it is pretty straightforward.

6. Lets take a look at some small windows on the righthandside. Categories is simple, you can choose one or more categories where you post will be shown in. Tags, enter tags to your post, makes it easy for others to find your post when searching

7. In this window, you can save your post as a draft, or delete it. The preview option gives you the post like it will be shown once published. If you hit publish , your post goes live

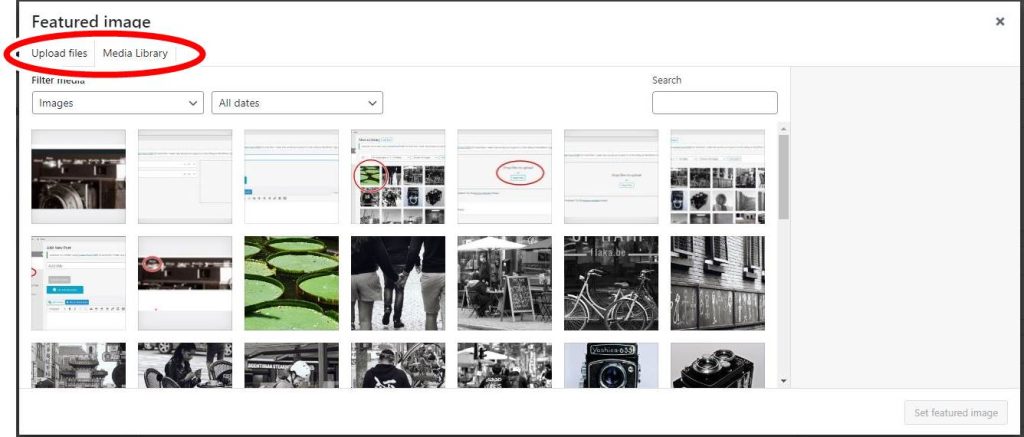
8. Setting the featured image. This is the photo that will be shown as a background to your post. It is a bit the first contact that people have with your post.


Just select this button and the window will open and you can choose to use one of the library or upload a new one.

9. At the bottom of your screen ,you have the option to insert a Post Header. So what is this. Simple this is the photo that will be shown at the top of your post behind the title.

You got the following selections

1 choose your media, t will take you to the library so you can choose one or upload a new one.
2 Here you can choose the size of the header.
3. You can position your header photo here, top, center or bottom
4. If you not want an image as background you can go for a solid color.
5. This option will change the color of your text in the header, so title etc.

Very well done Peter. Thanks for putting it all together.
Loved doing it
Well done sir, I wish I had that from the start, maybe I would still have my ponytail haha j/
king
There was a need for it